> ## Documentation Index
> Fetch the complete documentation index at: https://docs.intelligence-management-platform.com/llms.txt
> Use this file to discover all available pages before exploring further.
# Users & access overview
> Manage who can sign in and what they can do: the Users · Roles · Teams surface at /users.
export const RightsCallout = ({right, flags}) =>
Who sees this: requires {right === "none" ? "no special rights — available to every signed-in user" : `the ${right} right (or super admin)`}.
{flags && flags !== "none" ? ` Only visible when the server enables ${flags}.` : ""}
;
## What the surface is
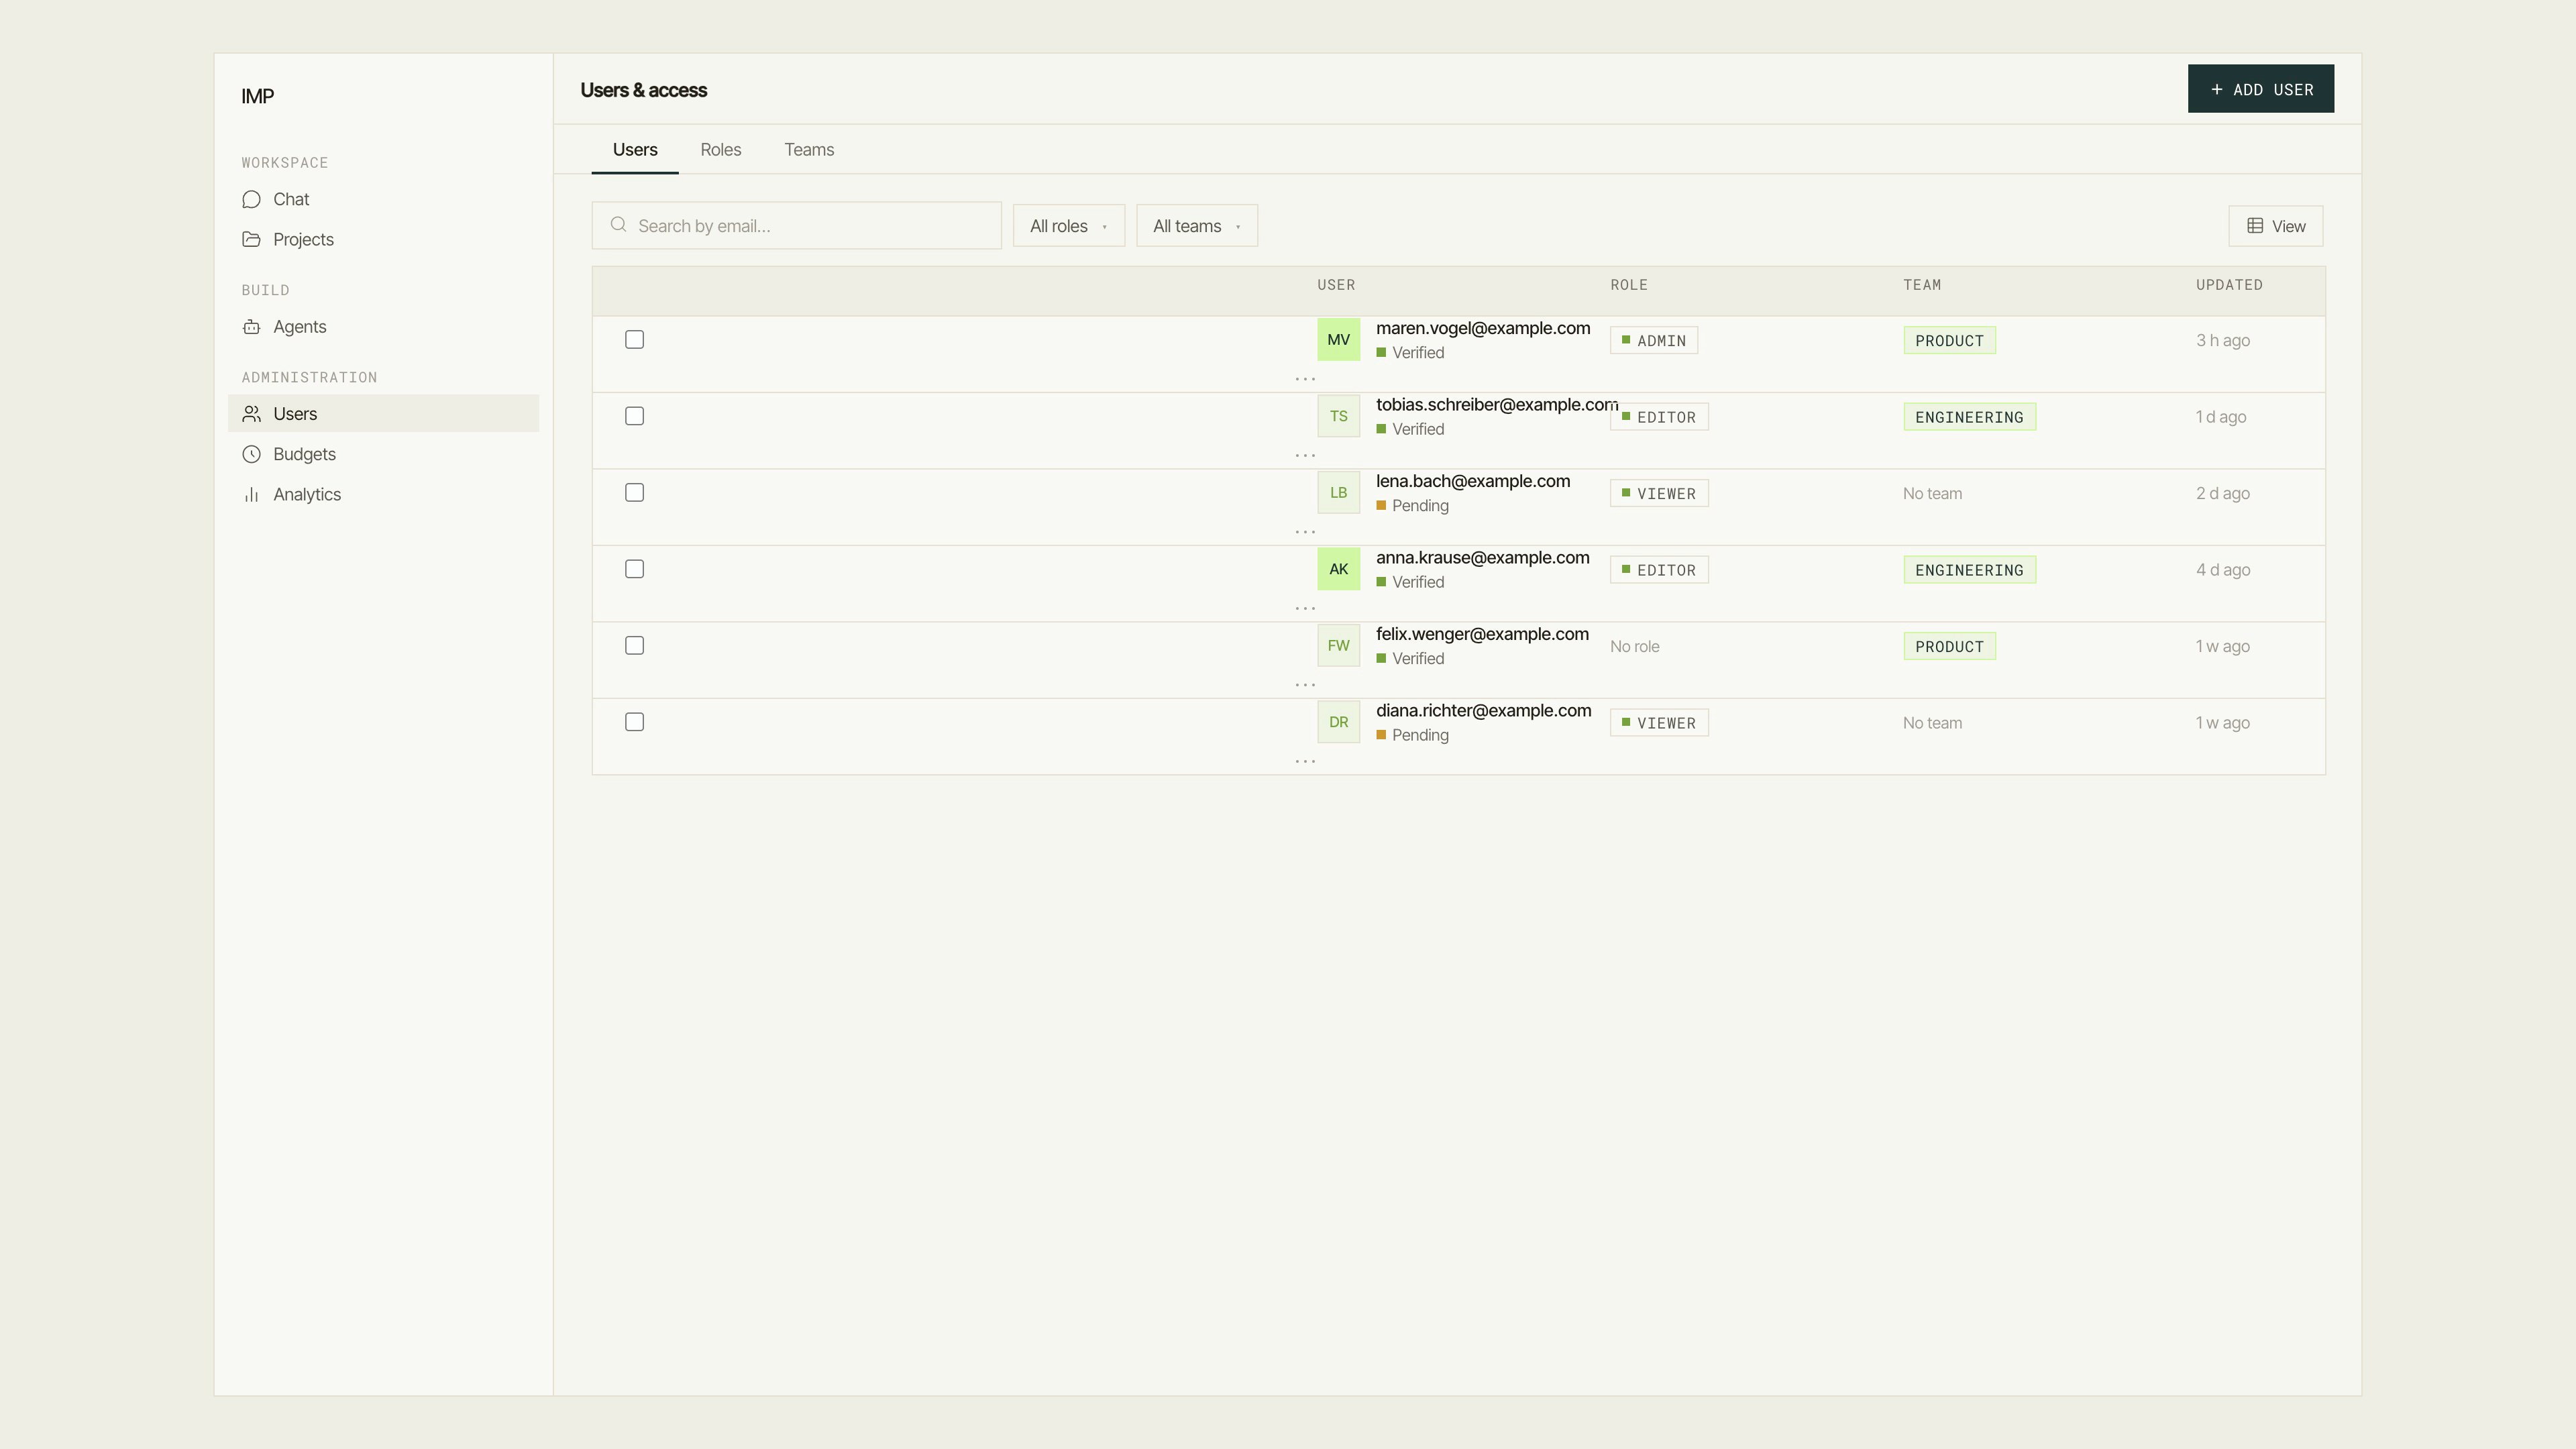
The **Users & access** surface (`/users`) is the single entry point for all identity and permission management. It opens to a tabbed layout with three tabs — **Users**, **Roles**, and **Teams** — so all related tasks stay in one place without separate routes.
The routes `/roles` and `/teams` are redirect aliases that land you directly on the Roles or Teams tab. Deep links to these paths work; the browser URL resolves to `/users?tab=roles` or `/users?tab=teams`.
 ## Tabs
| Tab | What it manages |
| --------- | -------------------------------------------------------------------------- |
| **Users** | The list of all accounts: search, filter, bulk actions, user detail panel. |
| **Roles** | Permission roles and the permission matrix for each. |
| **Teams** | Teams for grouping users and attributing costs. |
Switching tabs preserves the filter state of each tab independently. For example, if you search for a user on the Users tab and then switch to Roles, the user search is still there when you switch back.
## Users tab
### Searching and filtering
The toolbar above the table provides:
* **Search by email…** — filters the list in real time as you type.
* **All roles** dropdown — narrows to users who have a specific role assigned.
* **All teams** dropdown — narrows to users who belong to a specific team.
* **Clear filters** — appears when any filter is active; resets all three at once.
A **View** menu lets you toggle the **Role**, **Team**, and **Updated** columns on and off. Column visibility is persisted for the session.
### The table
Each row shows:
* **User** column — email address and a verification status dot (Verified / Pending).
* **Role** — the role assigned to this user, or "No role" if none.
* **Team** — the team, or "No team".
* **Updated** — when the user record was last changed.
Click any row to open the user detail panel.
### User detail panel
The panel opens as a sheet on the right side. It contains:
**Identity** — email, user ID, status (Verified / Pending), created date, and last-used date.
**Access** — role and team selectors. Changing either prompts a confirmation dialog before committing the change.
**Actions** — a **Reset password…** button that generates a temporary password you copy and deliver to the user manually.
**Danger zone** — the super-admin toggle and a **Delete user** button.
### Super-admin toggle
The super-admin toggle is in the **Danger zone** section of the user panel. Granting or revoking super-admin status requires a confirmation dialog. IMP blocks self-demotion: if you try to remove your own super-admin status, the action is rejected with a message explaining that another super admin must do it. The confirmation for revoking super-admin includes a warning: removing the last super admin locks everyone out of administration and requires a database-level intervention to restore.
Removing super-admin from the last administrator makes the administration area inaccessible to everyone. Confirm that at least one other super admin exists before revoking.
### Add user
The **Add user** button in the page header is visible only to super admins. Clicking it opens a two-step dialog:
1. Enter the user's email address.
2. Copy the generated temporary password and send it to the user manually.
The user should change the temporary password on first sign-in.
### Bulk actions
Select multiple users with the checkboxes in each row. The selection bar that appears offers three actions:
| Action | What it does |
| ---------------- | ----------------------------------------------------------------------------------------------------------------------------------------------------------- |
| **Assign role…** | Opens a role picker; applies the chosen role to every selected user. |
| **Assign team…** | Opens a team picker; applies the chosen team to every selected user. |
| **Remove** | Deletes the selected users after a confirmation. Your own account is excluded automatically and the dialog shows a warning if it was part of the selection. |
Partial bulk failures are reported per-item in the confirmation dialog.
## Next steps
Edit the permission matrix for each role across all seven right areas.
Create and manage teams for cost attribution and content sharing.
Set spending limits per user, role, team, project, or agent.
Review usage, spend, and activity across the organization.
## Tabs
| Tab | What it manages |
| --------- | -------------------------------------------------------------------------- |
| **Users** | The list of all accounts: search, filter, bulk actions, user detail panel. |
| **Roles** | Permission roles and the permission matrix for each. |
| **Teams** | Teams for grouping users and attributing costs. |
Switching tabs preserves the filter state of each tab independently. For example, if you search for a user on the Users tab and then switch to Roles, the user search is still there when you switch back.
## Users tab
### Searching and filtering
The toolbar above the table provides:
* **Search by email…** — filters the list in real time as you type.
* **All roles** dropdown — narrows to users who have a specific role assigned.
* **All teams** dropdown — narrows to users who belong to a specific team.
* **Clear filters** — appears when any filter is active; resets all three at once.
A **View** menu lets you toggle the **Role**, **Team**, and **Updated** columns on and off. Column visibility is persisted for the session.
### The table
Each row shows:
* **User** column — email address and a verification status dot (Verified / Pending).
* **Role** — the role assigned to this user, or "No role" if none.
* **Team** — the team, or "No team".
* **Updated** — when the user record was last changed.
Click any row to open the user detail panel.
### User detail panel
The panel opens as a sheet on the right side. It contains:
**Identity** — email, user ID, status (Verified / Pending), created date, and last-used date.
**Access** — role and team selectors. Changing either prompts a confirmation dialog before committing the change.
**Actions** — a **Reset password…** button that generates a temporary password you copy and deliver to the user manually.
**Danger zone** — the super-admin toggle and a **Delete user** button.
### Super-admin toggle
The super-admin toggle is in the **Danger zone** section of the user panel. Granting or revoking super-admin status requires a confirmation dialog. IMP blocks self-demotion: if you try to remove your own super-admin status, the action is rejected with a message explaining that another super admin must do it. The confirmation for revoking super-admin includes a warning: removing the last super admin locks everyone out of administration and requires a database-level intervention to restore.
Removing super-admin from the last administrator makes the administration area inaccessible to everyone. Confirm that at least one other super admin exists before revoking.
### Add user
The **Add user** button in the page header is visible only to super admins. Clicking it opens a two-step dialog:
1. Enter the user's email address.
2. Copy the generated temporary password and send it to the user manually.
The user should change the temporary password on first sign-in.
### Bulk actions
Select multiple users with the checkboxes in each row. The selection bar that appears offers three actions:
| Action | What it does |
| ---------------- | ----------------------------------------------------------------------------------------------------------------------------------------------------------- |
| **Assign role…** | Opens a role picker; applies the chosen role to every selected user. |
| **Assign team…** | Opens a team picker; applies the chosen team to every selected user. |
| **Remove** | Deletes the selected users after a confirmation. Your own account is excluded automatically and the dialog shows a warning if it was part of the selection. |
Partial bulk failures are reported per-item in the confirmation dialog.
## Next steps
Edit the permission matrix for each role across all seven right areas.
Create and manage teams for cost attribution and content sharing.
Set spending limits per user, role, team, project, or agent.
Review usage, spend, and activity across the organization.