> ## Documentation Index
> Fetch the complete documentation index at: https://docs.intelligence-management-platform.com/llms.txt
> Use this file to discover all available pages before exploring further.
# Attachments and session files
> Upload files for the agent to work with, download what it produces, and understand where session files live.
export const RightsCallout = ({right, flags}) =>
Who sees this: requires {right === "none" ? "no special rights — available to every signed-in user" : `the ${right} right (or super admin)`}.
{flags && flags !== "none" ? ` Only visible when the server enables ${flags}.` : ""}
;
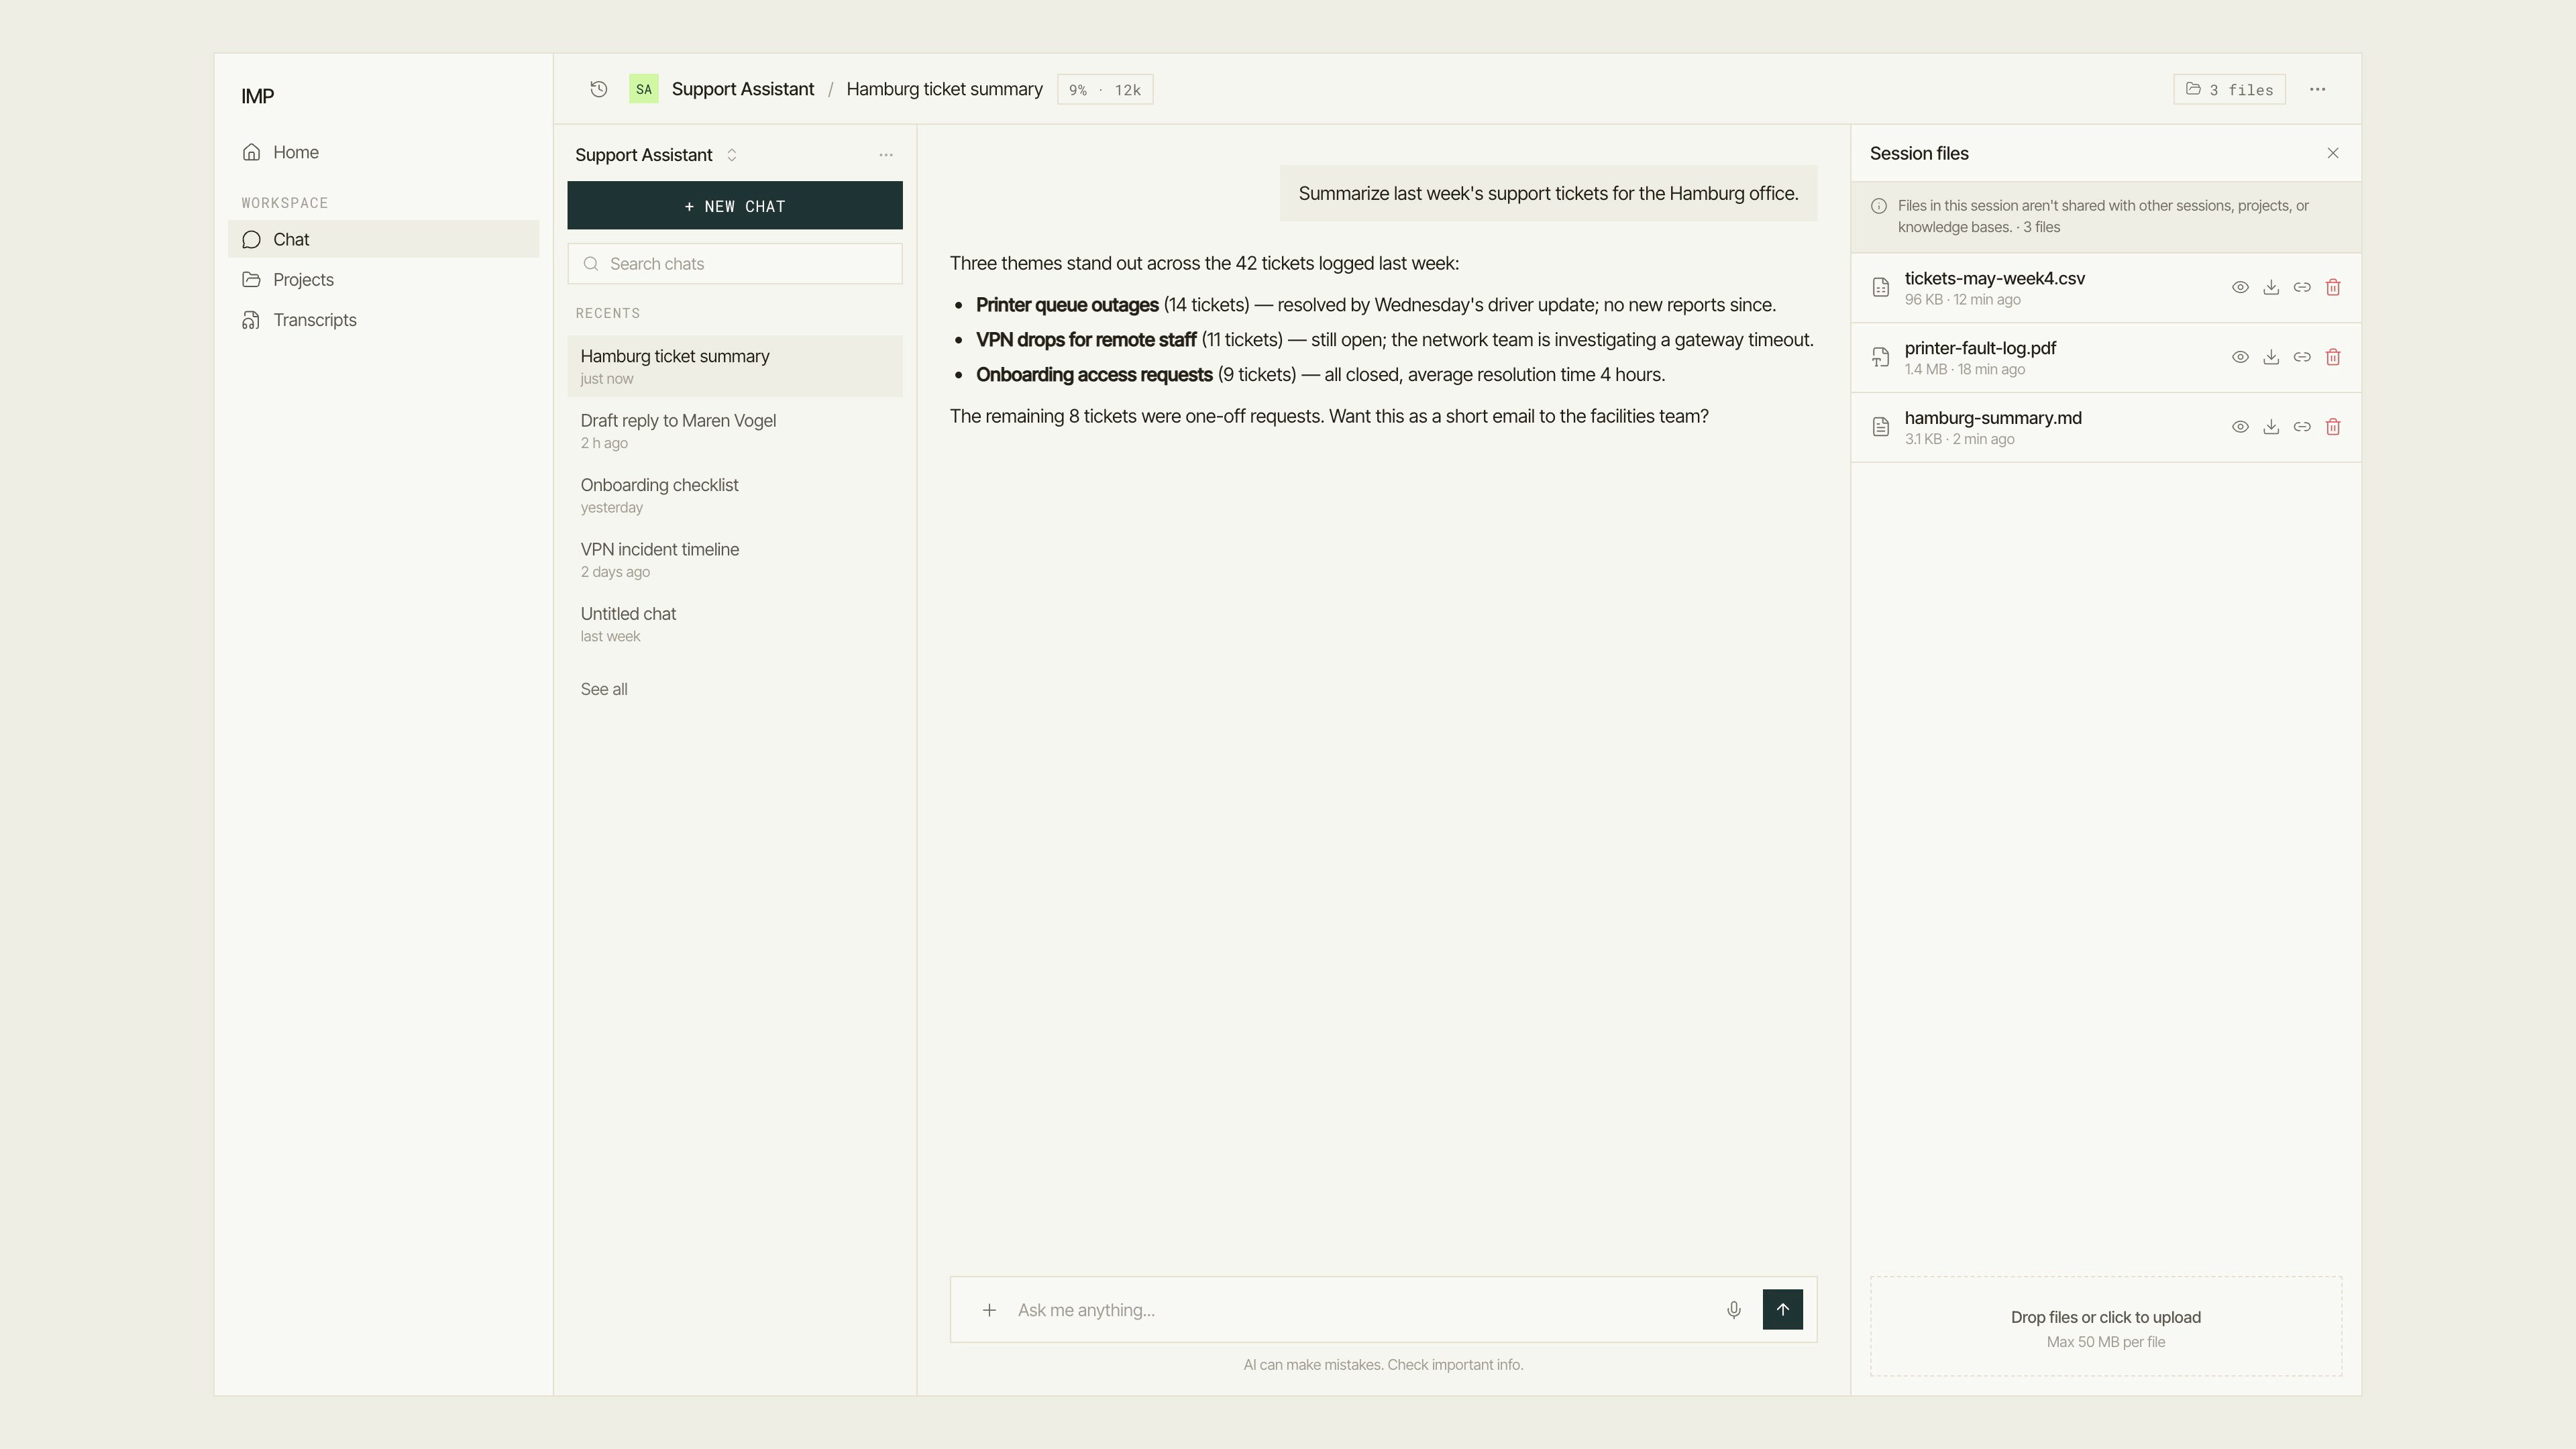
Every conversation has its own file space. Files you upload and files the agent produces appear side by side in the **Session files** panel.
Session files require the agent's file sandbox. If the menu entry is greyed out with "Unavailable — the file sandbox is off for this agent.", that agent can't work with files — pick a different agent or ask the person who built it.
## Open the Session files panel
Two ways:
* Click **+** in the composer and choose **Session files** ("View and upload files for this session").
* When the conversation already has files, click the file-count chip in the header (for example **3 files**).
The panel opens on the right. On desktop you can drag its edge to resize it.
 ## Upload files
The upload zone sits at the bottom of the Session files panel: "Drop files or click to upload". It also shows the per-file size limit.
Drag files onto the zone, or click it to pick files from your computer. You can upload several at once.
Once uploaded, the agent can read the files in its sandbox — just ask it to, for example "Summarize the attached report". You can also reference a file by name with
## Upload files
The upload zone sits at the bottom of the Session files panel: "Drop files or click to upload". It also shows the per-file size limit.
Drag files onto the zone, or click it to pick files from your computer. You can upload several at once.
Once uploaded, the agent can read the files in its sandbox — just ask it to, for example "Summarize the attached report". You can also reference a file by name with @ (see below).
## Work with files
Each file row shows its name, size, and age, plus four actions:
* **Preview** — opens the file inside the panel. Text, code, images, PDFs, and Office documents preview inline; other types are download-only.
* **Download** — saves the file to your computer.
* **Share** — creates a link to share the file.
* **Delete** — removes the file after you confirm ("Delete file?"). This cannot be undone.
Files the agent produces appear in the list automatically within a few seconds — keep the panel open while the agent works to watch results arrive.
## Reference a file with @
In the message box, type @ to open a **Session files** autocomplete listing this conversation's files. Pick one to insert its name into your message, so the agent knows exactly which file you mean. If the session has no files yet, the menu says "No files in this session yet".
## Attachments on your next message
Some tool results — a generated image, an exported document — can be attached to your next message directly from the conversation. Attached files appear under the message box in an **Attachments** row; remove any of them before sending.
## Where session files live
Session files are private to the conversation: "Files in this session aren't shared with other sessions, projects, or knowledge bases." To make a document permanently searchable by agents, it needs to be added to a knowledge context instead — see [Knowledge overview](/building/knowledge/overview) in the Building guide.