> ## Documentation Index
> Fetch the complete documentation index at: https://docs.intelligence-management-platform.com/llms.txt
> Use this file to discover all available pages before exploring further.
# Chat overview
> Start a conversation with an agent, and find your way around the chat screen.
export const RightsCallout = ({right, flags}) =>
Who sees this: requires {right === "none" ? "no special rights — available to every signed-in user" : `the ${right} right (or super admin)`}.
{flags && flags !== "none" ? ` Only visible when the server enables ${flags}.` : ""}
;
## Choose an agent
Open **Chat** from the sidebar. If your organization has more than one agent, IMP shows the **Choose an agent** screen: "Pick the agent you want to talk to. You can switch at any time." Select an agent card to start.
If only one agent is available — or an administrator has set a default agent — IMP skips the picker and takes you straight into a conversation.
If you see **No agents available** ("You don't have access to any agents yet. Please contact your administrator."), an administrator needs to grant you access to at least one agent first.
## The chat screen
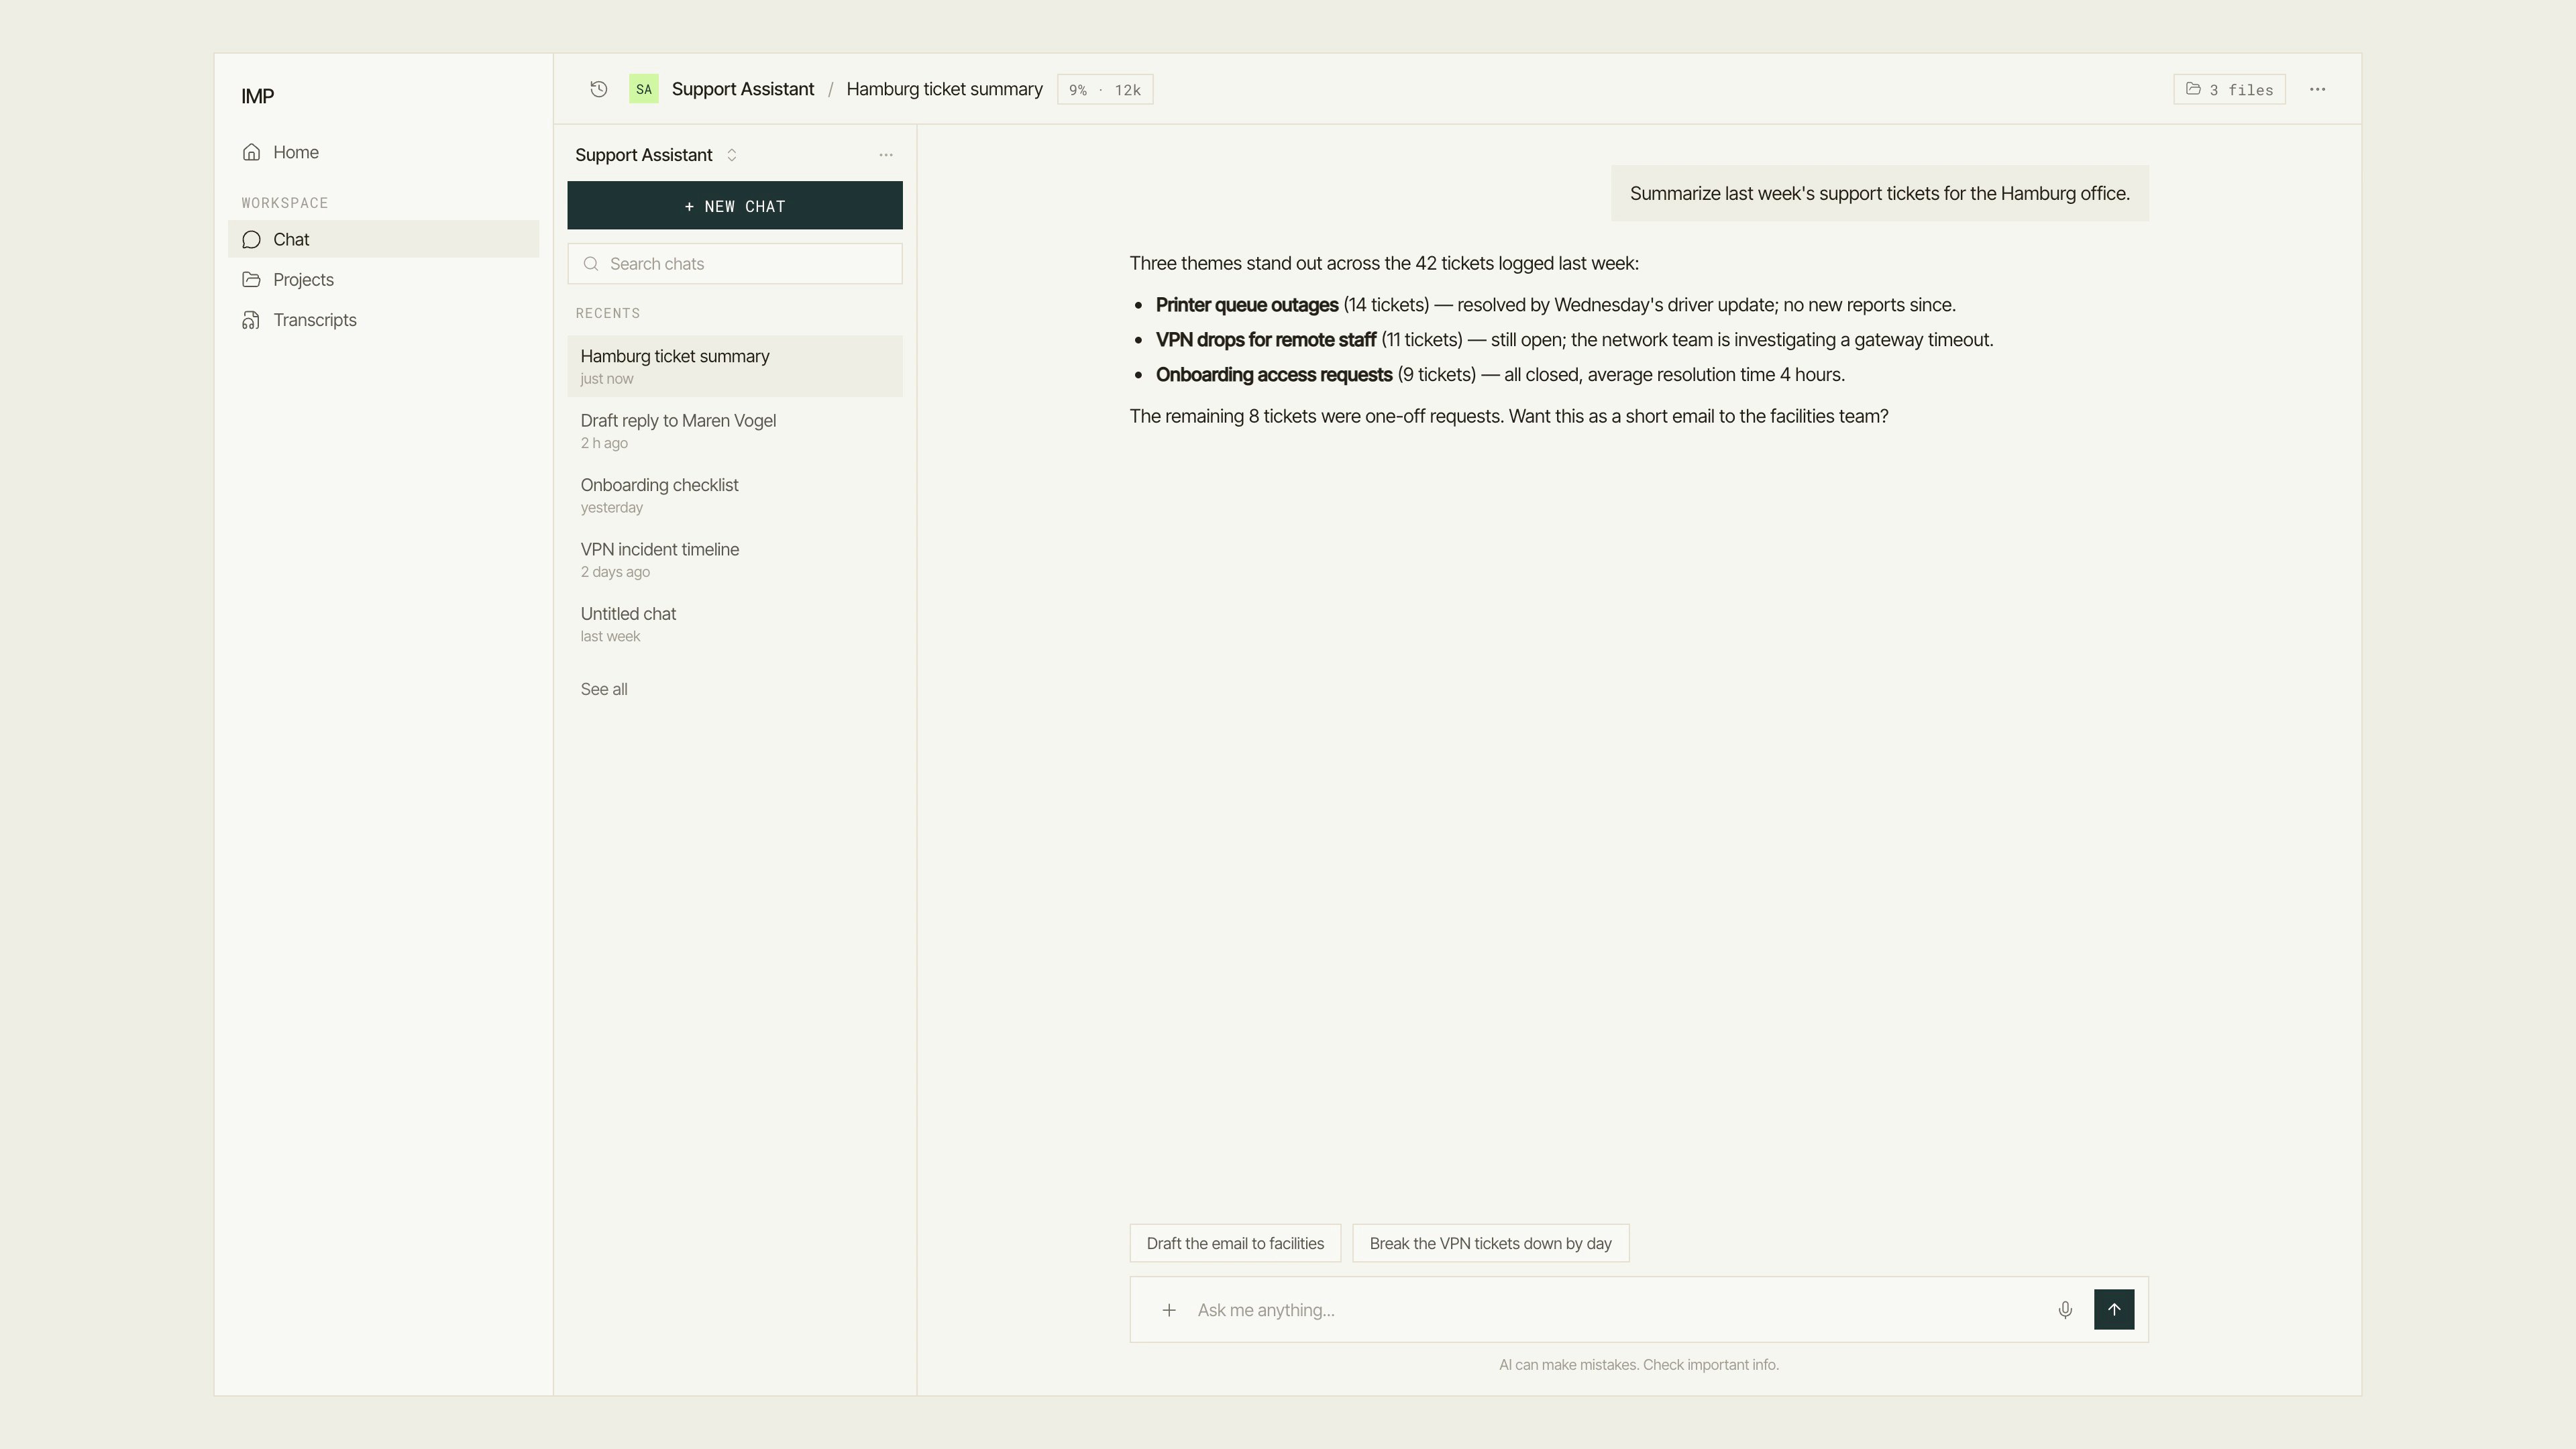 * **History rail** — your past conversations with this agent: a **New chat** button, a **Search chats** filter, and a **Recents** list. See [Conversations](/user-guide/chat/conversations).
* **Header** — the agent's name and the conversation title. Click the title to rename it. A quiet usage chip (for example `9% · 12k`) shows how much of the model's context window this conversation uses; click it for a token and budget breakdown.
* **⋯ menu** — **Share**, **Save as Routine**, **Model…**, **Usage**, and **Delete conversation**. Press ⌘+. to open it from the keyboard.
* **Conversation column** — messages stream in here. Agent replies can include citations, sources, reasoning steps, and tool results you can expand.
* **Composer** — the message box at the bottom. It has exactly four controls: the **+** button (the **Add to conversation** menu), the text field ("Ask me anything..."), a microphone (when [dictation](/user-guide/chat/dictation) is enabled), and the send button.
## Send your first message
Click into the message box and type. Press Shift+Enter for a new line.
Press Enter or click the send button. The conversation is created automatically with your first message — you don't need to set anything up.
The answer streams in live. While the agent is responding, the send button becomes a stop button you can use to interrupt it.
After a reply, some agents show up to three follow-up suggestions above the message box. Click one to fill the message box with it — you can still edit before sending.
The line under the composer reminds you: "AI can make mistakes. Check important info."
## The Add to conversation menu
The **+** button opens the **Add to conversation** menu, which holds everything you can bring into the chat:
* **History rail** — your past conversations with this agent: a **New chat** button, a **Search chats** filter, and a **Recents** list. See [Conversations](/user-guide/chat/conversations).
* **Header** — the agent's name and the conversation title. Click the title to rename it. A quiet usage chip (for example `9% · 12k`) shows how much of the model's context window this conversation uses; click it for a token and budget breakdown.
* **⋯ menu** — **Share**, **Save as Routine**, **Model…**, **Usage**, and **Delete conversation**. Press ⌘+. to open it from the keyboard.
* **Conversation column** — messages stream in here. Agent replies can include citations, sources, reasoning steps, and tool results you can expand.
* **Composer** — the message box at the bottom. It has exactly four controls: the **+** button (the **Add to conversation** menu), the text field ("Ask me anything..."), a microphone (when [dictation](/user-guide/chat/dictation) is enabled), and the send button.
## Send your first message
Click into the message box and type. Press Shift+Enter for a new line.
Press Enter or click the send button. The conversation is created automatically with your first message — you don't need to set anything up.
The answer streams in live. While the agent is responding, the send button becomes a stop button you can use to interrupt it.
After a reply, some agents show up to three follow-up suggestions above the message box. Click one to fill the message box with it — you can still edit before sending.
The line under the composer reminds you: "AI can make mistakes. Check important info."
## The Add to conversation menu
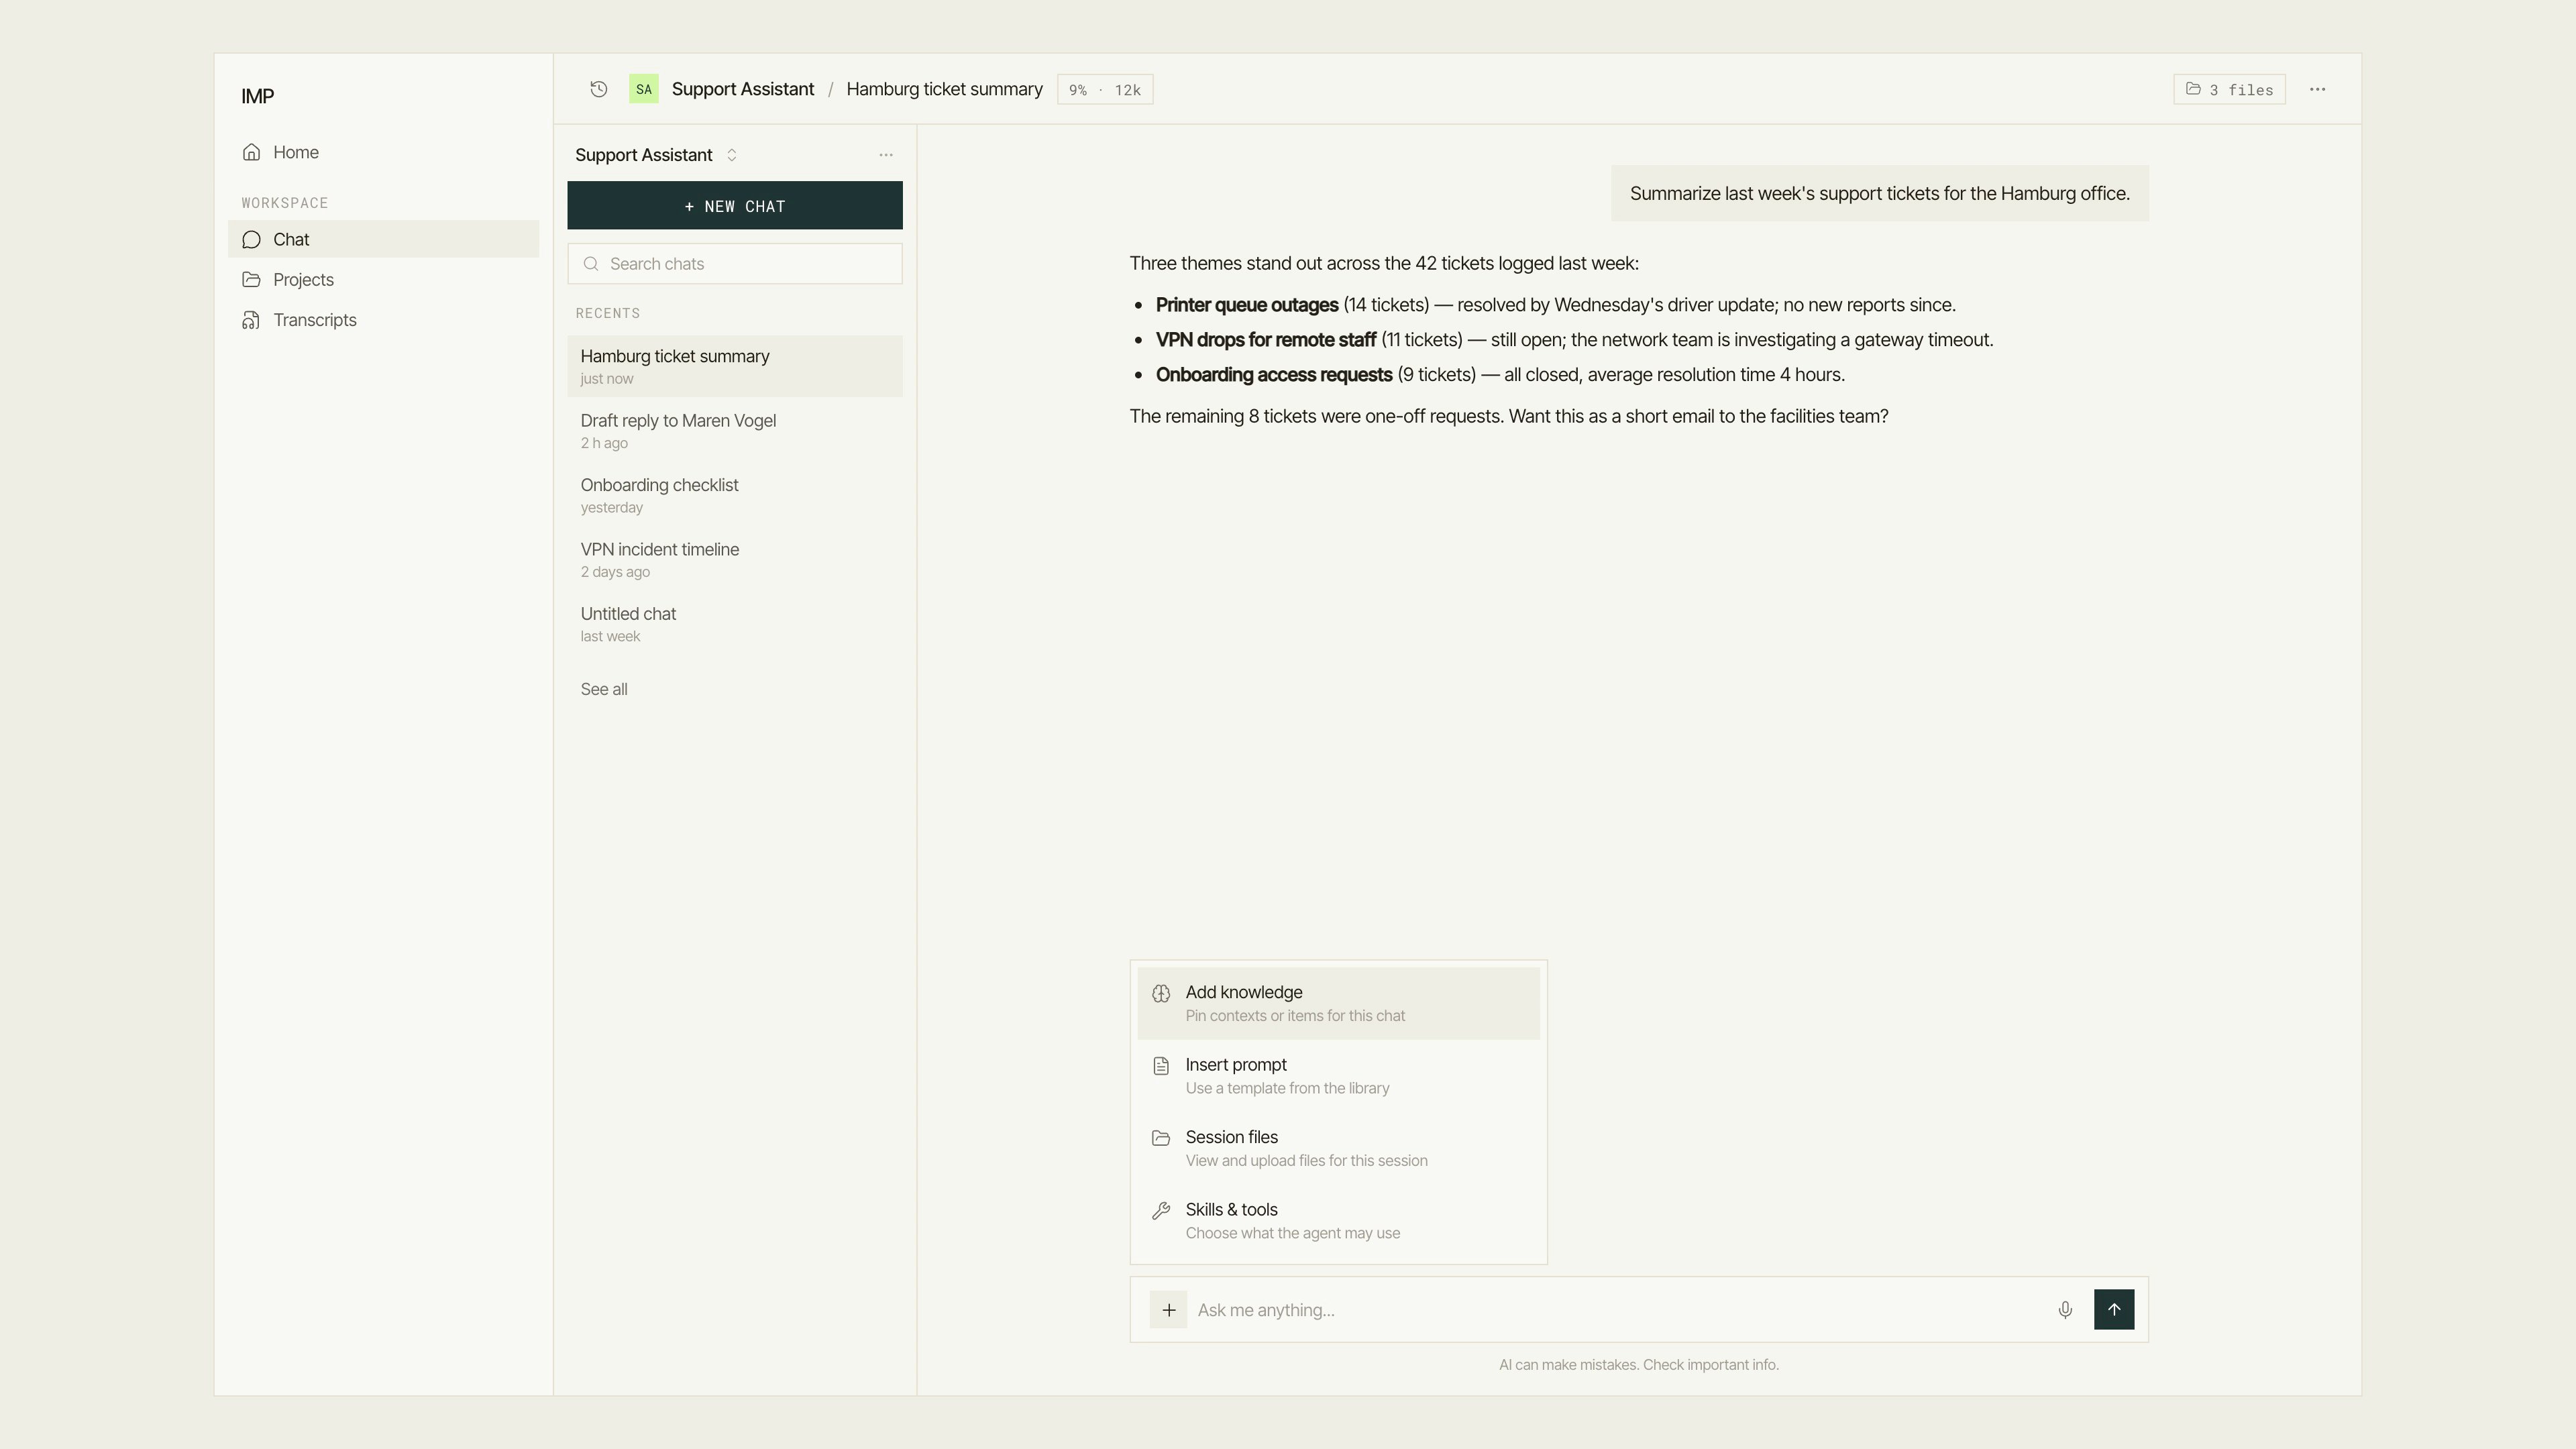
The **+** button opens the **Add to conversation** menu, which holds everything you can bring into the chat:
 | Entry | What it does |
| ------------------ | ------------------------------------------------------------------------------------------------------------------------------- |
| **Add knowledge** | "Pin contexts or items for this chat" — see [Pinned knowledge and presets](/user-guide/chat/pinned-knowledge-and-presets). |
| **Insert prompt** | "Use a template from the library" — see [Prompts in chat](/user-guide/chat/prompts-in-chat). |
| **Session files** | "View and upload files for this session" — see [Attachments and session files](/user-guide/chat/attachments-and-session-files). |
| **Skills & tools** | "Choose what the agent may use" — toggle individual capabilities on or off for this conversation. |
## Next steps
Rename, search, share, and delete your chats.
Upload files for the agent and download what it produces.
Speak instead of typing.
Focus the agent on specific contexts and items.
| Entry | What it does |
| ------------------ | ------------------------------------------------------------------------------------------------------------------------------- |
| **Add knowledge** | "Pin contexts or items for this chat" — see [Pinned knowledge and presets](/user-guide/chat/pinned-knowledge-and-presets). |
| **Insert prompt** | "Use a template from the library" — see [Prompts in chat](/user-guide/chat/prompts-in-chat). |
| **Session files** | "View and upload files for this session" — see [Attachments and session files](/user-guide/chat/attachments-and-session-files). |
| **Skills & tools** | "Choose what the agent may use" — toggle individual capabilities on or off for this conversation. |
## Next steps
Rename, search, share, and delete your chats.
Upload files for the agent and download what it produces.
Speak instead of typing.
Focus the agent on specific contexts and items.