

Session files require the agent’s file sandbox. If the menu entry is greyed out with “Unavailable — the file sandbox is off for this agent.”, that agent can’t work with files — pick a different agent or ask the person who built it.
Open the Session files panel
Two ways:- Click + in the composer and choose Session files (“View and upload files for this session”).
- When the conversation already has files, click the file-count chip in the header (for example 3 files).
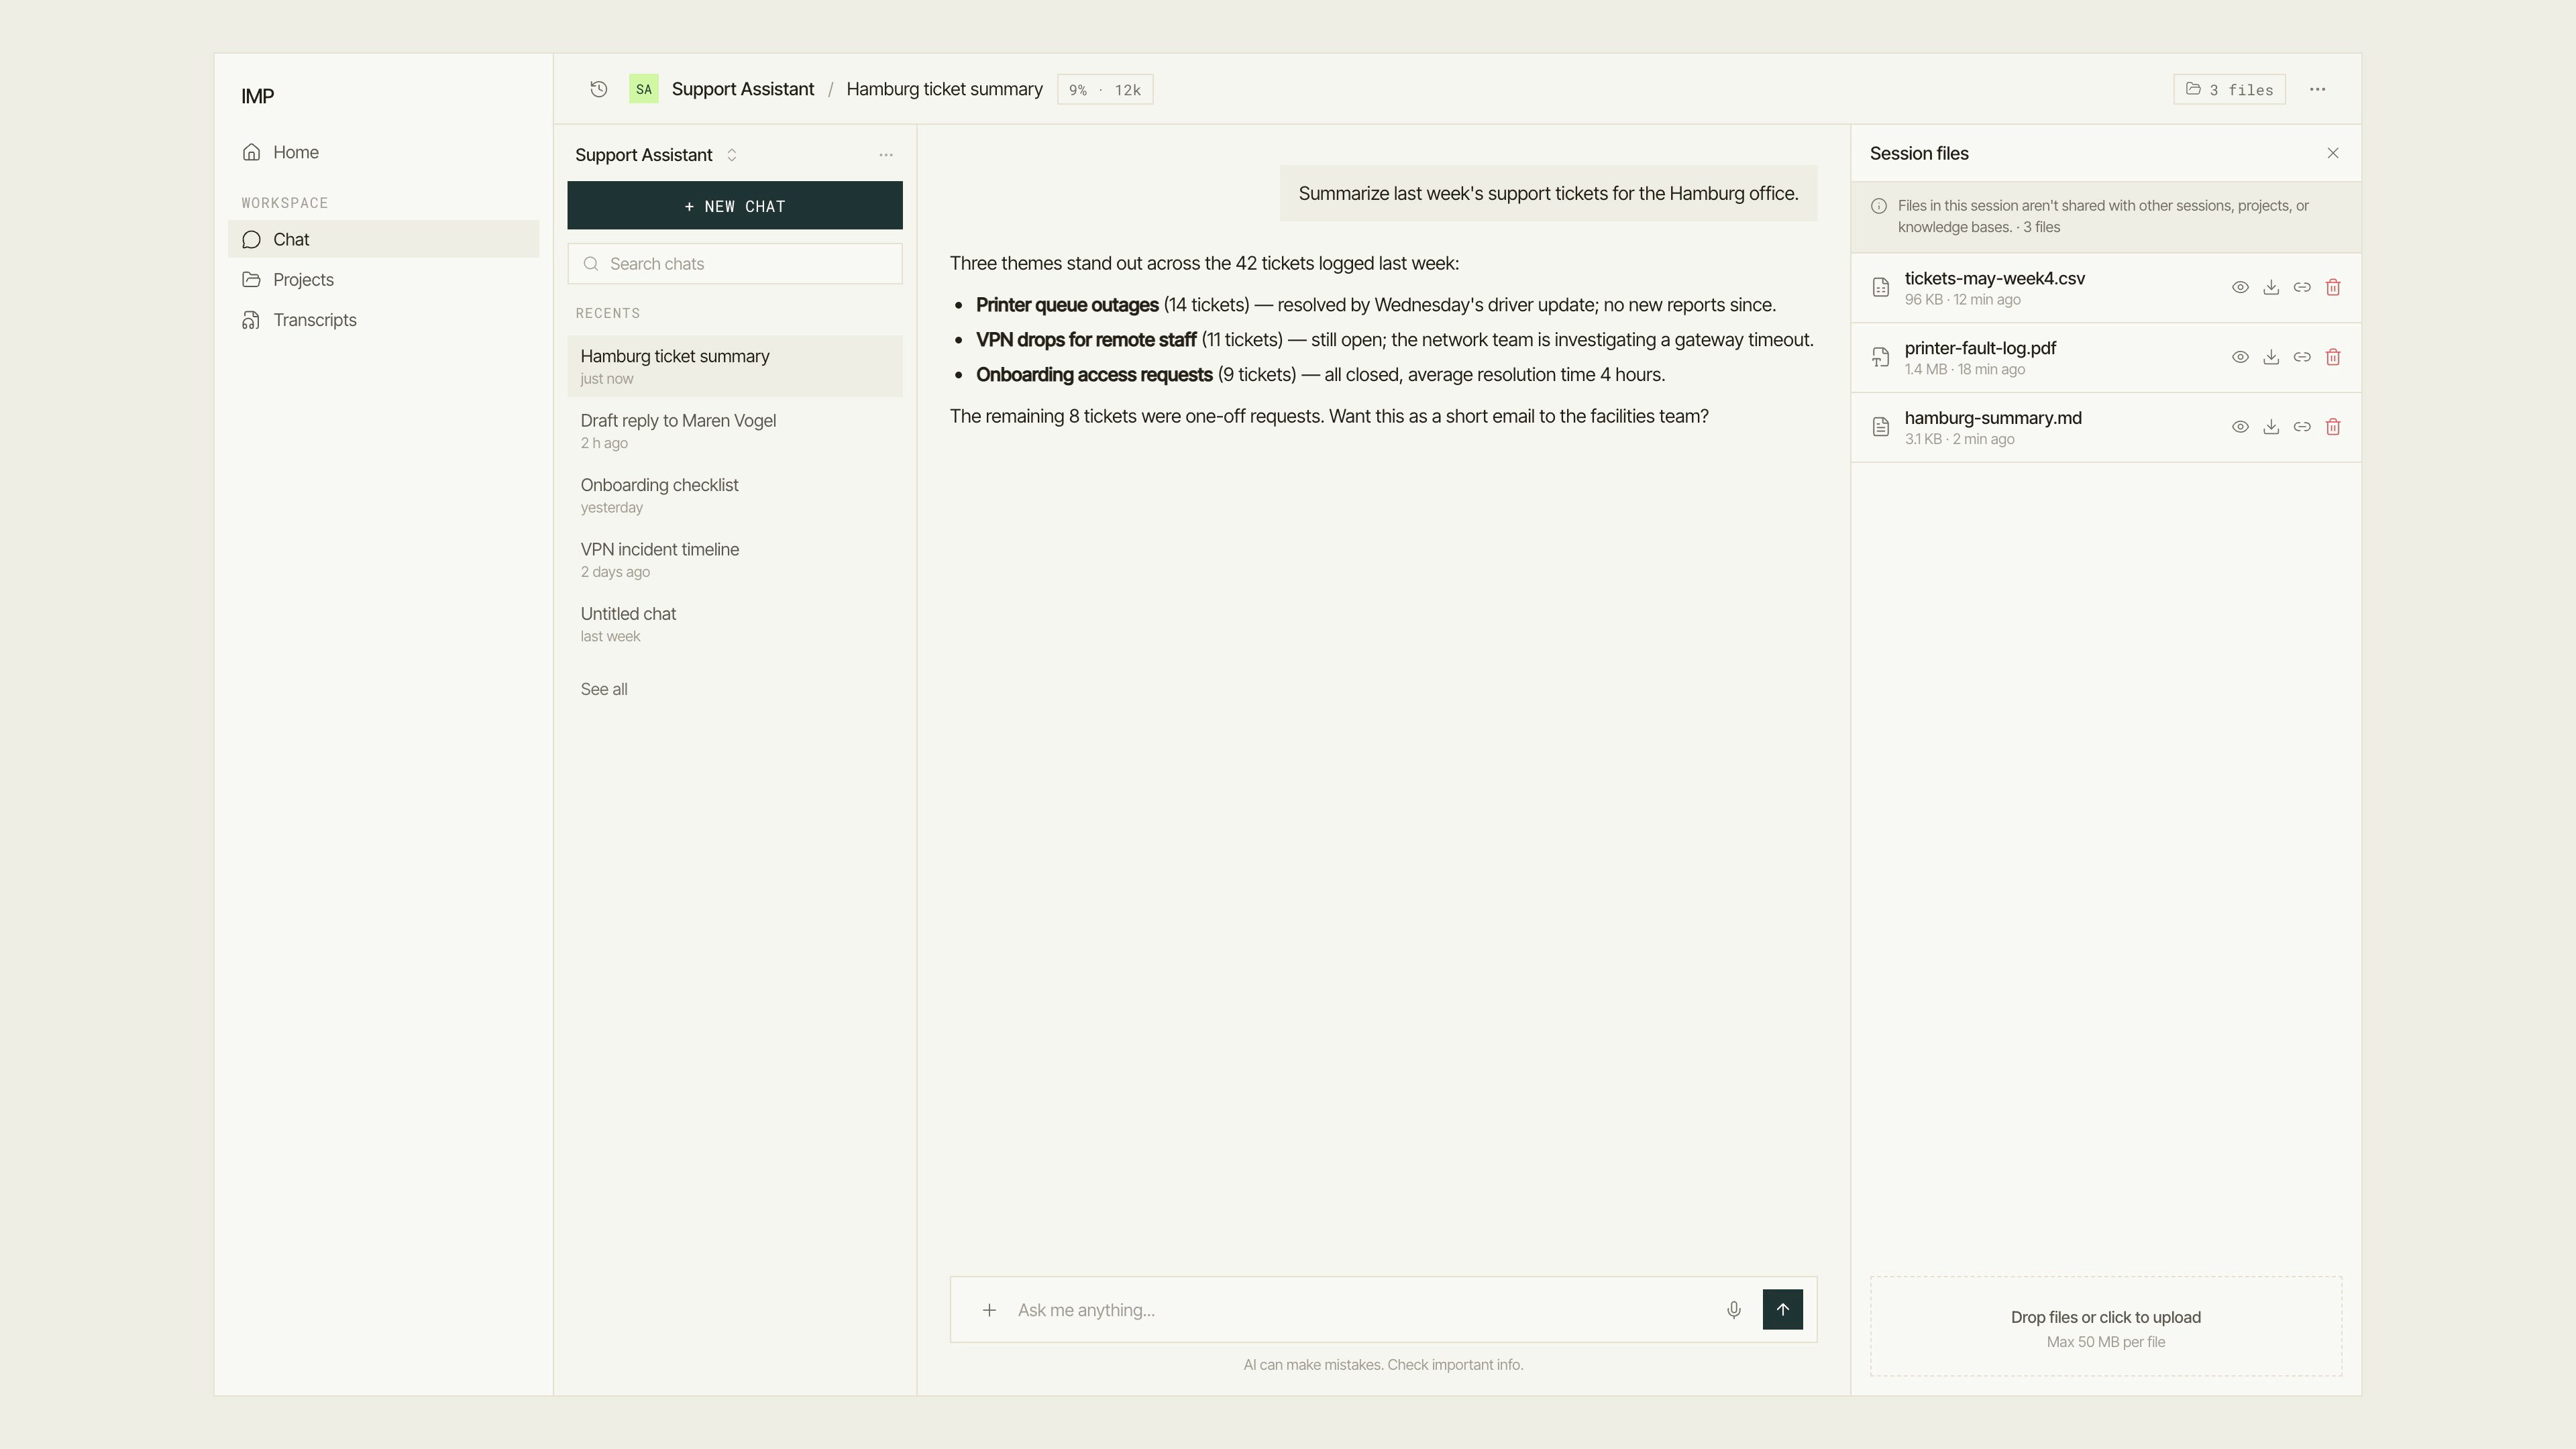
The Session files panel with uploaded and agent-produced files.
Upload files
1
Open the upload zone
The upload zone sits at the bottom of the Session files panel: “Drop files or click to upload”. It also shows the per-file size limit.
2
Add your files
Drag files onto the zone, or click it to pick files from your computer. You can upload several at once.
3
Use them in the conversation
Once uploaded, the agent can read the files in its sandbox — just ask it to, for example “Summarize the attached report”. You can also reference a file by name with
@ (see below).Work with files
Each file row shows its name, size, and age, plus four actions:- Preview — opens the file inside the panel. Text, code, images, PDFs, and Office documents preview inline; other types are download-only.
- Download — saves the file to your computer.
- Share — creates a link to share the file.
- Delete — removes the file after you confirm (“Delete file?”). This cannot be undone.
Reference a file with @
In the message box, type@ to open a Session files autocomplete listing this conversation’s files. Pick one to insert its name into your message, so the agent knows exactly which file you mean. If the session has no files yet, the menu says “No files in this session yet”.
Attachments on your next message
Some tool results — a generated image, an exported document — can be attached to your next message directly from the conversation. Attached files appear under the message box in an Attachments row; remove any of them before sending.How the agent reads documents
When you upload a PDF or Office document (Word, Excel, PowerPoint), the agent can parse it on demand using two tools:parse_document— extracts the full text from a PDF or Office file. For plain-text or CSV files,read_session_fileis the right tool instead.view_document_page— fetches specific pages from a document, useful when the agent needs to look up a particular section without re-extracting the entire file.
Oversized outputs and session file offload
When a tool produces a very large result — for example, a long database query or a dense extracted document — the output may exceed the amount the model can hold in its context window at once. In that case the full output is automatically saved as a session file, and the agent receives a short notice that it can callread_session_file with a filename, offset, and line limit to read the output in pages.
You will see the offloaded file appear in the Session files panel under a name like tool-output-<tool>-<id>.txt. The agent works through it progressively and reports back as it reads each section.